Forms
Uh-oh! It looks like your ad blocker is preventing the video from playing.
Please watch it on YouTube

Learn how to create, share and gather information using Forms 🖋️
Forms make it easy to collect information from others, even if those people aren’t part of your Notion workspace or don’t use Notion at all. All members on all Notion plans can create and use forms.
Forms are connected to databases, so each question in your Forms is connected to a property in your database. This way, your Forms live right alongside their responses, and you can use the information you collect in the same way you use information in any other kind of database.

Note: The following actions are only possible using Notion’s desktop and web apps, and cannot currently be done on a mobile device:
Creating a new Form.
Customising a Form.
To create a new Forms:
In a page, use the slash command
/form.Select
Formsin the menu that appears.
When you create your new form, a Respondent property will be created automatically to capture your respondents’ names. You can also allow respondents to remain anonymous in your form sharing settings →
Note: To create a Form from an existing database, you must have Full access to the database that the Form is connected to.
If you have a database you’ve already been using to collect information from various people, it’s easy to add a Forms to that database! To create a Forms from an existing database:
In a database, select
+next to your existing views. Depending on your screen size, you may have to open the dropdown next to your current view and selectAdd view.In the menu that appears, select
Forms.Select
Create {#} questionsto proceed.
Create a Created by property in your database if you’d like to capture your respondents’ names. You can also allow respondents to remain anonymous in your form sharing settings →
Note:
To edit a Form, you must have
Can editaccess orFull accessto the database that the Form is connected to.Conditional logic, which allows you to customise what questions are shown to respondents based on their responses, is only available on Business and Enterprise plan.
Once you’ve created a Forms, you’ll be taken to the Forms builder, which looks like this.

The Forms builder lets you decide what your Forms will look like and how it will work when you share it for others to fill out. To configure your Forms:
Give your Forms a title and an optional description.
Hover over the Forms’ title to add a
Form iconor aForm cover.Click into the questions in your Forms to edit them. By default, any changes you make in the Forms will be synced with the names of your database properties. For example, if you create a new question that asks “What time do you prefer?”, a new property with that same name will be created in your database. If you change a Forms question from “Favourite colour” to “What’s your favourite colour?”, your “Favourite colour” database property will be renamed to “What’s your favourite colour?”.
To add more questions to your Forms, select
+underneath the last question.Hover over each question in your database and select
•••. From here, you can:Make the question
Required. This means that respondents will have to answer the question to submit the form.Add a
Descriptionto your question so people can better understand what you’re asking about.Show options asa list view or a dropdown if your question is multiple choice.Allow a
Long answerfor text property questions.Change the
Question type, which is the equivalent of the property type. For example, this could be aMultiple choicequestion type or property if you want to ask a yes or no question. It could be aDatequestion type or property if you want to ask about someone’s availability or birthday.For questions that are tied to multi-select, relation, and people properties, you can specify a maximum number of selections per response.
Toggle off
Sync with property nameif you want your Forms questions to look different from your database property names. For example, maybe you’d like to ask “What’s your favourite colour?” in your Forms, but you want the responses to be collected in a property with a more simple name, like “Favourite colour”.Add conditional logicif your question is multiple choice and you’re on the Business or Enterprise plan. For example, if the user selects option A, you can direct them to a specific follow-up question.Duplicate questionorDelete question.
Select
Forms settingsat the top of your Forms builder →Submit screen. From here, you can adjust the submission experience for your respondents, like the submit button'sColourandText, as well as theConfirmation titleandConfirmation body. You can also choose to receive an email copy of each submission.Once you’re done setting up your Forms, select
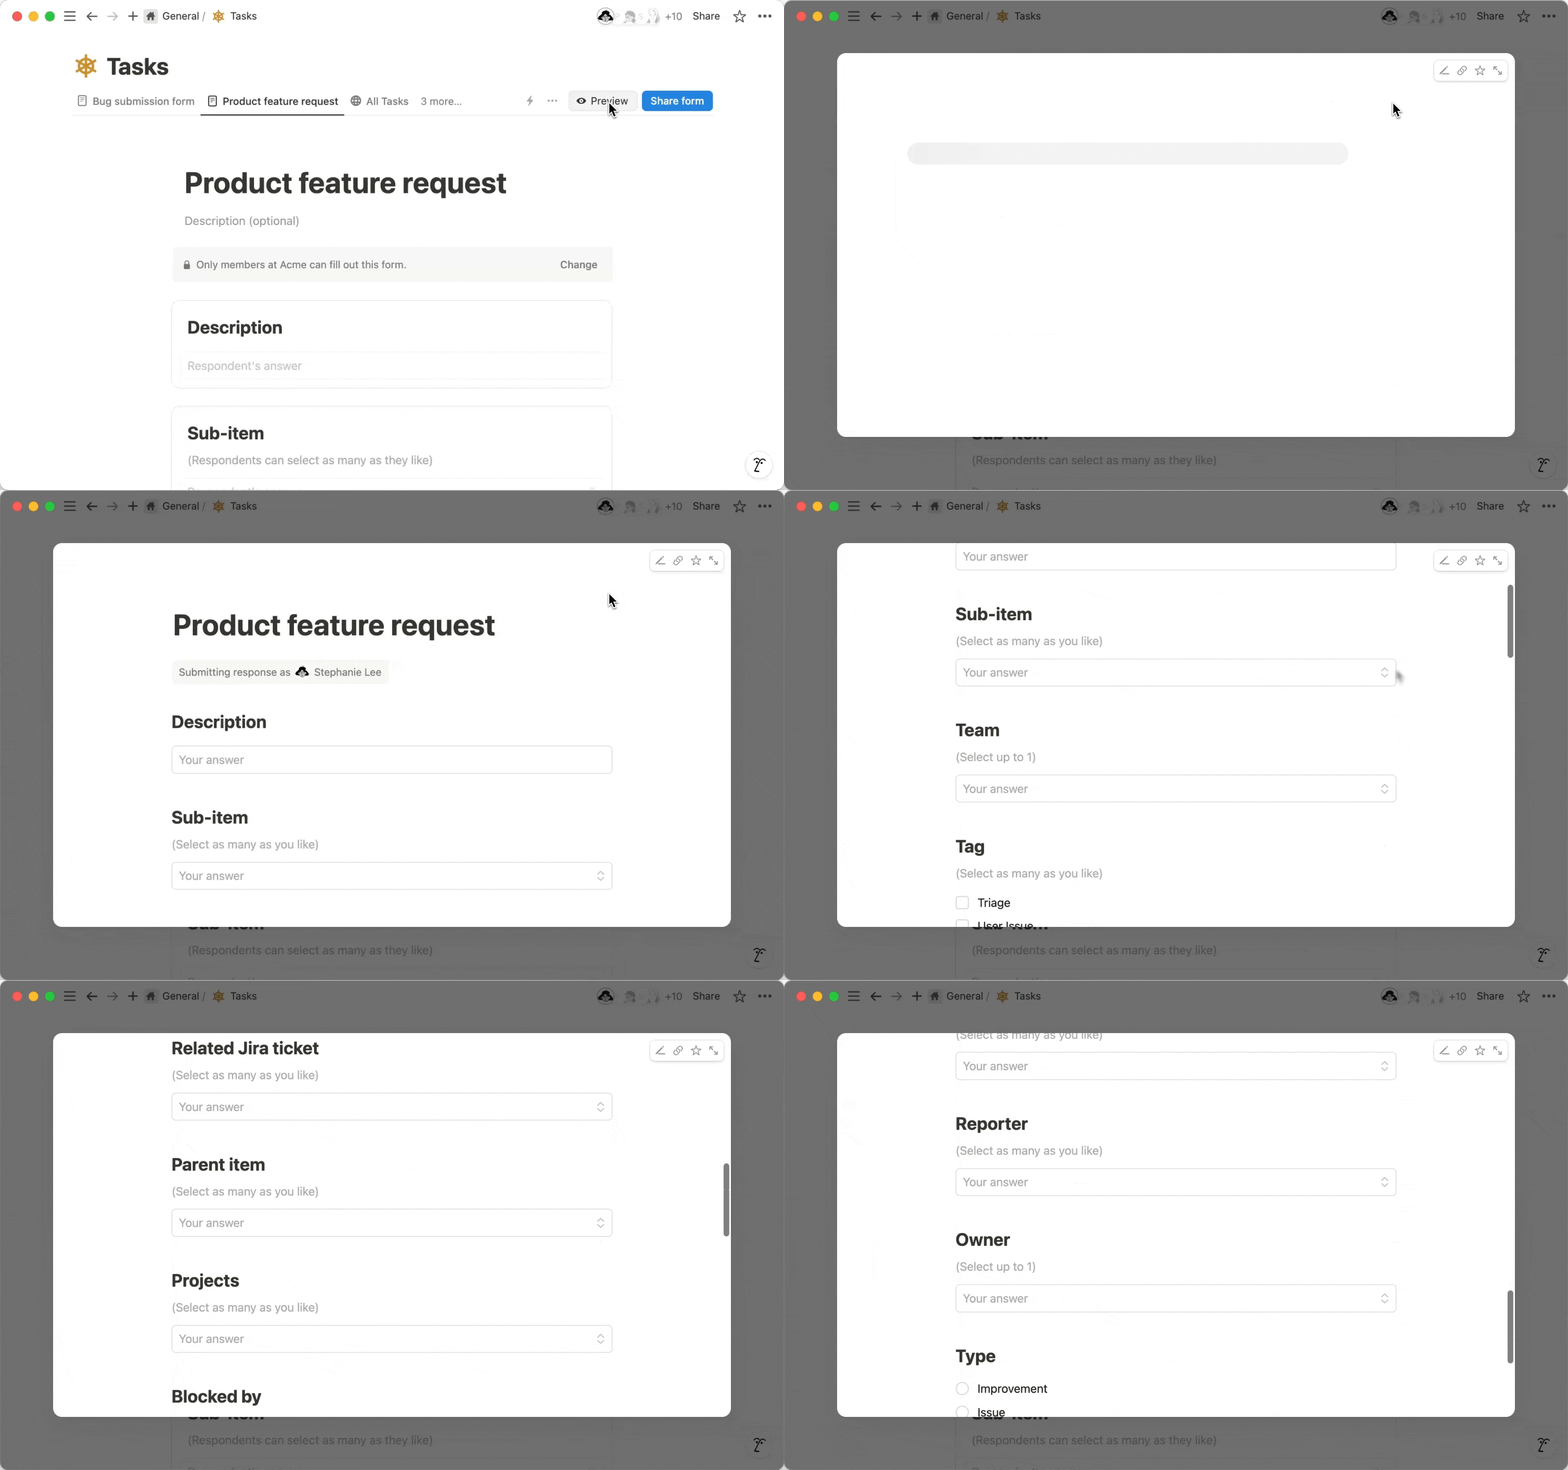
Previewat the top to see what your Forms will look like when you share it with others.
Note:
To change sharing settings for a Form, you must have
Full accessto the database that the Form is connected to.To Copy and share a Form’s URL, you must have at least
View accessto the database that the Form is connected to.Workspace owners on the Enterprise plan can choose to prevent Forms from being shared to the web. Learn how here →
To share your Forms:
Select
Share Formsat the top of the Forms builder.Select
Who can fill outand choose one of the following options:Anyone at {your workspace} with link, which means that any workspace members can fill out the Forms if they have the link. Guests can only fill out the Forms if they have been given access to the database that the Forms is connected to.Anyone on the web with link, which means people who aren’t part of your Notion workspace and people who don’t use Notion can fill out the Forms if they have the link.No access, which you can select if you’d like to close your form and stop accepting new responses.
If your Forms is available only to people in your workspace and anonymous responses are turned off, you’ll be able to select
Access to submissionand choose how respondents can interact with their submissions after they’ve been submitted:No accessmeans that the respondent won’t be able to see their Forms responses after submission.Can viewmeans that the respondent will be able to see their Forms responses after submission.Can commentmeans that the respondent will be able to comment on their Forms responses after submission.Can editmeans that the respondent will be able to edit their Forms responses after submission.Full accessmeans that the respondent will be able to edit their Forms responses after submission, as well as update permissions for the page containing their Forms responses.
If you’ve chosen to share your form with anyone on the web who has the link and you’re on a paid Notion plan, you can toggle
Notion brandingon or off depending on whether you want the Notion logo to appear in your form.Toggle
Anonymous responseson or off depending on whether you want the respondent’s name to be recorded when your form is filled out. Respondents for forms available toAnyone on the web with linkwill automatically be anonymous.In Forms created from scratch, this information will be captured in the
Respondentproperty, which is automatically created in your database.In Forms created from an existing database, you can create a
Created byproperty in the database to capture this information.
Copy the link to the Forms at the top of the menu and you’re ready to share.
Note: If you’re sharing a Form that is part of a template you have duplicated into your Notion workspace, make sure you set up a separate version of the Form from scratch so that all of your Form responses go to you and not the original Form’s creator.
You can fill out a Forms using your desktop or mobile device as long as you have the Forms link and the permissions required to do so. Keep in mind that some Forms can only be filled out when you’re logged into the Notion workspace where that Forms has been created.
To get a copy of your form responses, you’ll need to log into your Notion account or create a new one. You’ll only be able to edit your form responses if you have Can edit content access to the database, or Can edit access to the database page where your responses are stored.
Note:
To view Form responses, you must have at least
Can viewaccess to the database that the Form is connected to.To edit Form responses, you must have at least
Can edit contentaccess to the database that the Form is connected to.If your Form has a very high volume of responses, it might be slower to load. You might want to create a second version of your Form or Delete older responses that you no longer need.
At this time, you can't Export a Form view of a database. Try exporting your questions and responses from Table view instead.
By default, Forms responses will be stored in a Table view of your database named Responses. You’ll see your Forms questions as database properties.

You can analyse your Form responses by filtering and sorting them. You can also add a chart view to your database and customise it to visualise your responses. Learn more about how to analyse your Form responses here →
You can build automations into your Forms so that specific actions can be taken when you get a new response or when a question is answered a certain way. You can send status updates to the respondent, send them notifications in Slack, and more.
To do this:
Open your Forms builder.
Select
•••at the top →Automations.Add one or more triggers for the automation.
Add one or more actions for the automation.
Learn more about automations here →
If you’re a workspace owner on an Enterprise plan, you can prevent workspace members from making Forms available to anyone on the web who has the link. To do this, workspace owners can:
Go to
Settings→Security.In the
Securitytab, toggle onDisable publishing sites, forms, and public links.
Any Forms already live on the web will be taken down once you turn this setting on. Note that turning this setting on will also prevent members of your workspace from publishing Notion Sites.